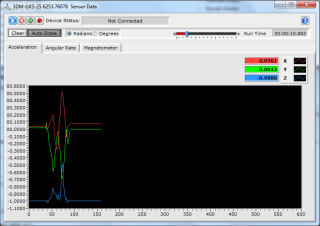
Lord IMU
advanced AHRS inertial and GPS sensors
Lord is one of our supporters for SubT Challenge and we received two types of sensors for testing and experiments: 3DM-GX5-25 and 3DM-GX5-45 (with GPS).
There are already ROS drivers available, but it is not the case of our robots.
So the first step was to integrate the sensors into OSGAR.
First of all copy of blog text from
SubT:
LORD 3DM-GX5-25 sensor
There are a couple of small notes I wanted to write down, primarily for me and
my colleagues, but it could be useful for other teams too. One of them is
description of the first steps with new 3DM-GX5-25 sensor, which we received
from supporting LORD company.
The sensor is small (approx 2x3cm) and comes with two cable options: USB and
RS232. USB has advantage of power source while in case of RS232 you have to
provide it extra … but RSR232 is often more reliable and easier to integrate
in small embedded devices. So far I tried the USB cable option on Windows 7
only.
First of all you will need to install driver otherwise the 3DM-GX5-25 device is
not recognized. The next step is to install
MIP Monitor for configuration and
visualization of data. I would recommend it because by default is the sensor
silent, so you have to talk to it first in order to receive any data.
In order to integrate the sensor in
OSGAR library I had two
problems:
- checksum did not match
- selected types of messages had to be configured after boot-up
Thanks to great support from Barry both issues were quickly sorted out. The
checksum is computed in two separate bytes and both are stored (see
Fletcher Checksum
Algorithm).
Setting the configuration was more tricky — you have to switch also sensor to
running mode before you save the configuration! It make sense, as by default you
may want to change parameters before getting loads of data.
Here are the instructions:
MIP Monitor allows you to write your settings to the 3DM-GX5-25 non-volatile
memory.
By following this method, each time you power up the inertial sensor, the
settings will automatically actuate without any intervention by the host
computer.
As an example:
    Launch MIP Monitor software and connect to the 3DM-GX5-25 as normal.
    Click once on the 3DM-GX5-25 Model/Serial/etc. readout to highlight it.
    Click Settings.
    Click Load Default Settings and a confirming message box appears.
    Click OK and the message box disappears.
    Click Settings.
    Click Device and the Device Setup window appears.
    Click the Estimation Filter tab.
    Click the Message Format sub-tab.
    Select Attitude (Euler RPY) in the drop-down.
    Select 100 Hz in the drop-down.
    Click OK and the Device Setup window disappears.
    Click Control.
    Click Run.
    Click Settings.
    Click Save Current Settings and a confirming message box appears.
    Click OK and the message box disappears.
    Click File.
    Click Exit and MIP Monitor closes.
Unplug the power to the 3DM-GX5-25.
Plug the power back into the 3DM-GX5-25.
Note that after a few blips of the green LED, the LED will begin blipping
rapidly, indicating that the 3DM-GX5-25 has initialized, and is now outputting
100 Hz Euler angles.
It works.
Barry also suggested hints regarding calibration and Auto Adaptive functions
… but I would postpone it when the sensor is mounted on the robot (which is
unfortunately not yet, and that would require another „report”).
p.s. I forgot the most important thing:
3DM-GX5-25
manual
LORD 3DM-GX5-45 sensor
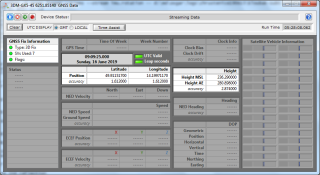
The main difference when compared to 3DM-GX5-25 is integration of DGPS. The
sensor has GPS antenna and integrates IMU with absolute GPS coordinates. I was
quite happy that there are simple monitor tools, where you can see what types
of messages are configured and what values are received:
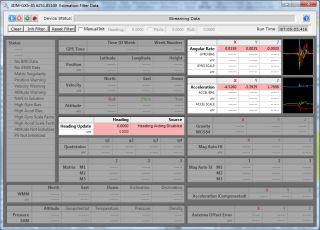
In particular if you look at EF Data Monitor you will notice that Heading
Aiding Disabled:
Why? I do not know the reason yet. I suppose that the initial heading is not
defined or IMU is not properly calibrated yet.


